Previously we had a look on how we can set up a virtual machine and get it ready to install Kali Linux. In this article we would learn to configure Kali Linux on virtual machine. After using the Kali Linux OS Live with limited access we will now go ahead with the installing and configuring Kali Linux on Virtual Box.
As we had discussed we need specific hardware to build up a hacker’s machine. Not all network adapters are supported for hacking wi-fi networks. We will discuss the usage of compatible adapters in forthcoming articles.
Continuing from Installing Kali Linux VirtualBox. We move on with steps for configuring Kali Linux VirtualBox :
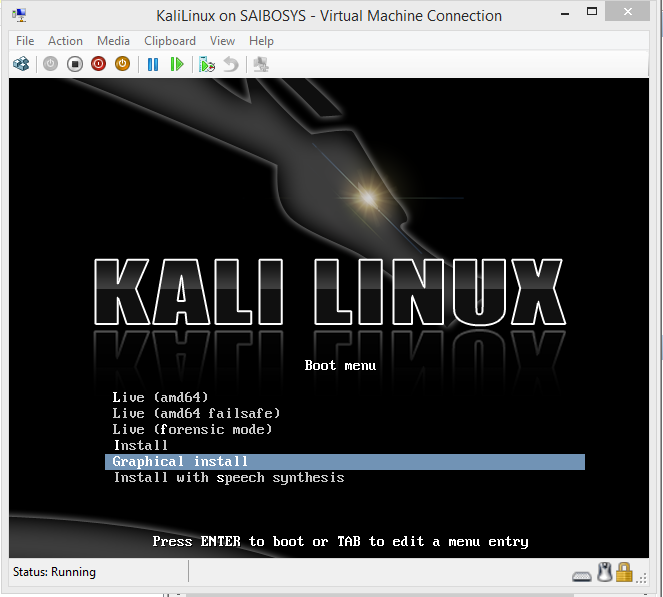
1) Choose Graphical install and Click Enter.
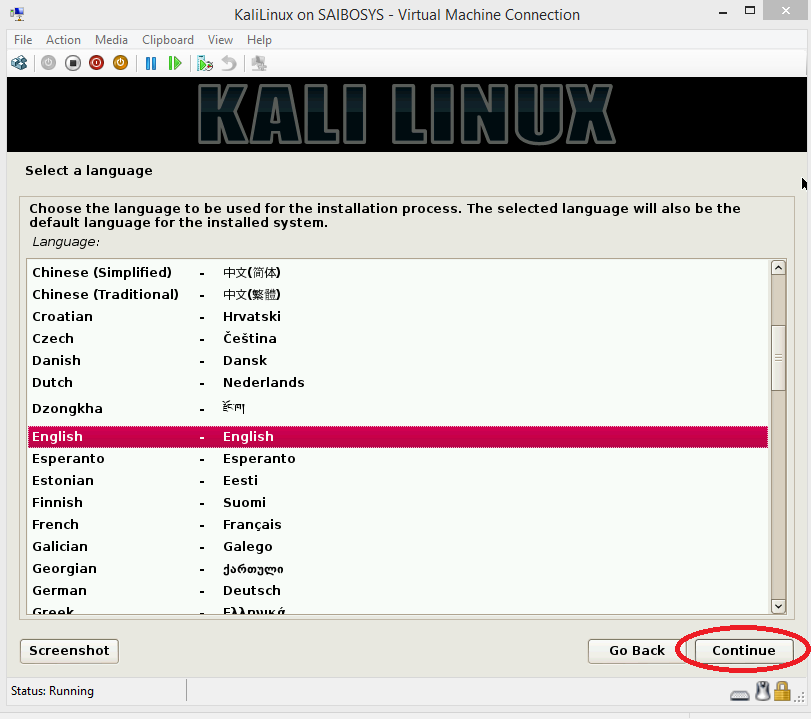
2) Choose your preferred language option.
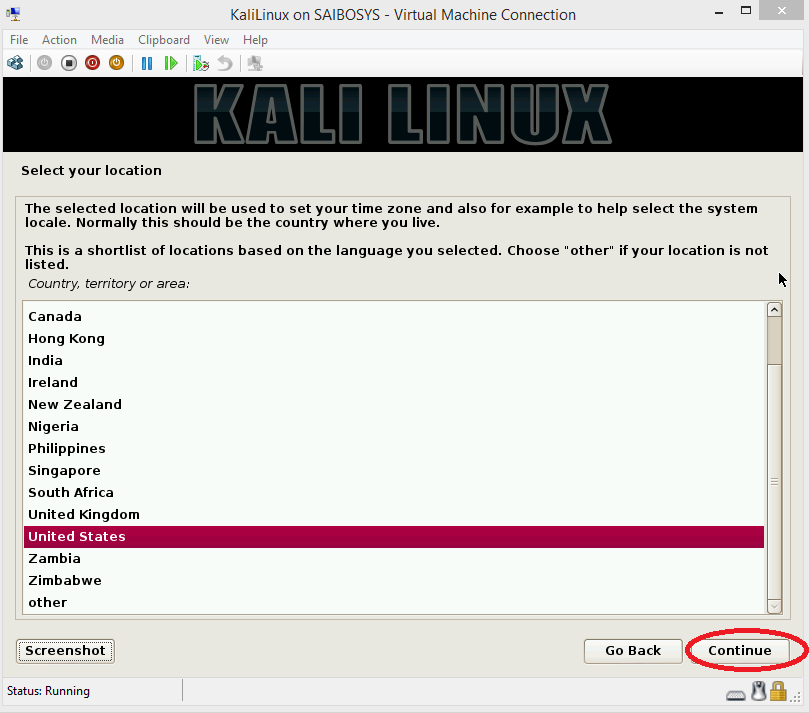
3) Choose your Country and click continue.
4) You may encounter a network configuration error as we have not set any internet connection with the installation. Click on Continue.

5) Kali Linux will then create partitions on the virtual hard disk for further installation. The partition table data and sizes required are calculated automatically. You just need to continue at this step.
6) Click and Install the Grub boot loader on the virtual hard disk. This is necessary to boot your Kali Linux system without any external media.
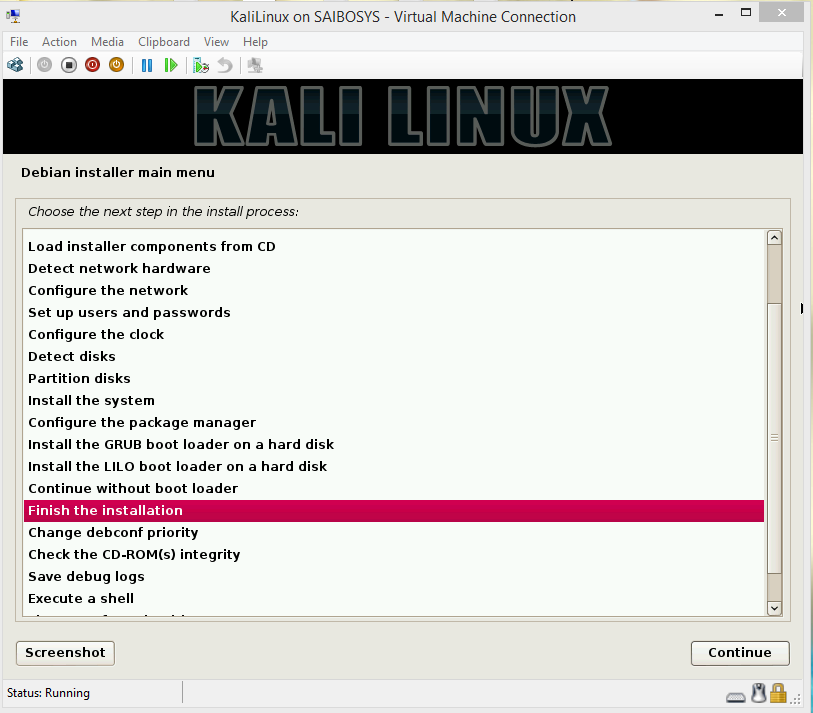
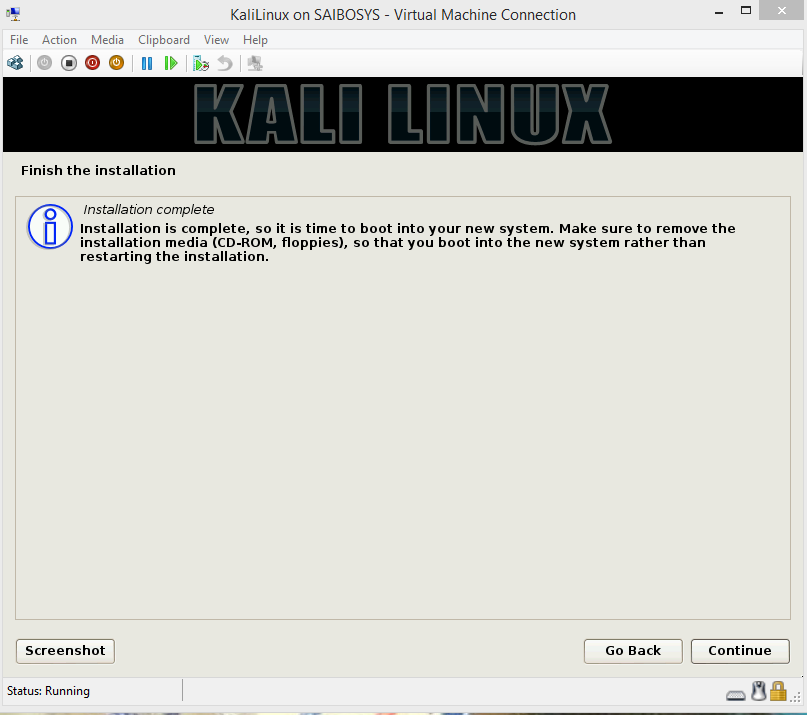
7) After Installing Kali Linux we will ‘Finish the installation’ and click continue.
8) Let the system shut down.
9) Go to VirtualBox Settings. Click on Storage and remove disk from virtual drive. If the disk is not removed after installing Kali linux on virtual box, the Virtual machine will boot from the rom.

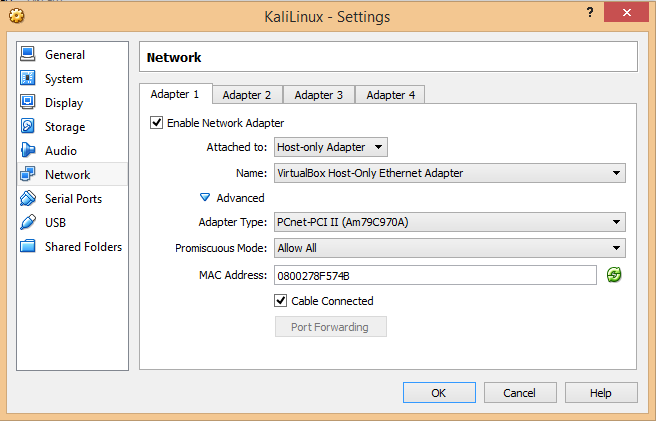
10) Now let us configure the Network settings. Enter the settings as shown in the pic below. These settings are required for an Ethernet connection. Your Ethernet adapter settings are shared along with the virtually with the VirtualBox.
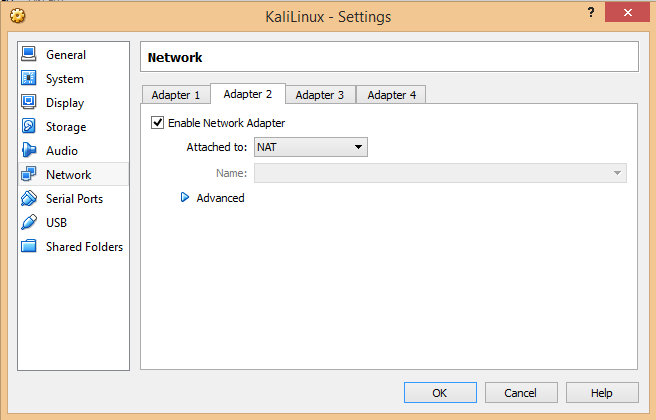
11) If you want to share your local pc’s internet connection with your Virtual box just enable the network adapter 2 and select ‘NAT’. The settings works even for even the internet connection dialed via usb modems.
12) Your installation and configuration of Kali Linux on Virtual box is complete. You can now boot your system and use your pc as you use the local machine.
We will discuss further tweaking and usage of Kali Linux in our forthcoming articles.
Disclaimer: The article is for Educational purpose only. The website and the author are not responsible for any unlawful use of this article. Please don’t misuse the information.